
Looking for Help?
Find answers to your questions
- Camera Installation Guide
- What Should I Do When the SD Card Is Full?
- How Can I Check If My SD Card Is Full?
- What Does the Number in the Upper Right Corner Mean?
- What Is the “Reduce Blur” Setting?
- How Should I Set the “Overexposure Suppression” Level?
- What Is Overexposure Suppression?
- Why doesn't my camera work during the Operation Hours I set?
- How long can 8 AA batteries last in photo-only mode?
- Why does my camera get stuck on "PC Camera" during a firmware update?
- Why Does My Camera Fail to Turn On and Make a Buzzing Sound?
- Why Is My Camera Screen Flickering, White, or Black?
- Why Are My Camera Photos or Videos Black and White at Night?
- Why Does the Camera Only Take Photos or Record Short Videos?
- Does a lower firmware version number indicate a firmware downgrade?
- How to Choose the Right Solar Panel for Your GardePro Camera?
- What should I do if the camera keeps saying "No SD Card"?
- What Is GardePro Edge AI and How Does AI Work on Trail Cameras
- How to Choose Trail Camera Settings for Different Wildlife Scenarios
- What Should I Do If My Trail Camera Keeps Turning Off?
- How can I enable the time-lapse function on the camera?
- How can I set the camera to work at a specific time?
- Why is my camera not recognized when connected to my computer?
- Why Doesn’t My Camera Take Photos at Night?
- Why Do Video Numbers Mismatch and Videos Fail to Play?
- Why Does the Screen Show “MCU Upgrading” When the Camera Powers On?
- Battery life is shorter than expected
- Camera won't power up
- Can an external power source and internal 8 batteries work together?
- FAQ about GardePro 8000 mAh Rechargeable Battery Pack
- FAQ about SD Cards
- FAQ on Reducing Trigger Delays / Slow Trigger for Wildlife Trail Camera
- How to choose the right solar panel for your camera
- How to reset the password?
- How to troubleshoot condensate, fog, or moisture on the camera lens?
- How to use 12V AC/DC Power Adapter for GardePro A3, A3S
- LED Glass / PIR Sensor Broken
- Resolving "No Firmware Available" Message
- The Camera Date&Time not saved
- The camera leak
- The camera screen has stripes/lines
- The tracking camera shows "low voltage"
- Troubleshooting Temperature Display Issues
- When I turn on the camera, the screen just continually flashes white
- Why does the camera show a black and white image instead of color at startup
- Why is it that I turn the camera on but the screen doesn't light up, the screen is black.
- Amazon Replace/Resend the product
- How to assemble the wall mount and install a camera with the wall mount ?
- How to estimate the wireless communication distance?
- How to locate and solve the disconnection issue?
- How to use GardePro A3S ?
- Solutions to special cases when using the camera
- What is the GardePro T5 and T6 Series?
-
Trail Camera Photo&video Problems
- How to Improve Night Videos Too Dark
- Night Picture Background Too Dark? Here's How to Improve It
- The pictures are cut off by grey
- Troubleshooting Short Night Videos on Your Trail Camera
- Why are the colour tones of pictures taken by the same camera not uniform?
- Why Does My Camera Not Have an APN Setting?
- How to Set Up APN on a SIM-Free Cellular Trail Camera?
- Why Is My Live Cellular Camera Showing Offline?
- Why Does My 4G Camera's Cellular Info Page Not Display Any Information?
- Why Does Live View Take 10–15 Seconds to Display Video with a Customer-Provided SIM Card?
- What is Dual-Core Technology?
- Why Does “Invalid SIM Card” Appear on SIM-Free Cellular Cameras?
- Can I Track My Stolen Cellular Camera?
- What Happens to My Subscription if My 4G Cellular Camera Is Stolen?
- Why Does My Cellular Trail Camera Show an X Instead of a Signal Bar?
- Can I Transfer My Cellular Data Plan to a New Camera?
- How to Purchase a Cellular Data Plan Outside the GardePro App?
- Why Doesn’t the QR Code Work?
- Why Is the QR Code Not Showing on My Cellular Trail Camera?
- Can I Use an Add-On Without a Main Plan?
- Can I get a price adjustment for the wrong subscription purchase?
- Is there any obligation when I purchase a photo subscription?
- Why is there no sound in my video?
- How to cancel or remove a data plan?
- 4G module upgrade instructions
- Failed activation solution for GardePro cellular trail camera Pre-installed SIM card
- GardePro 4G Cellular LTE Data Plan
- GardePro Cellular Trail Camera Model Comparison
- GardePro Cellular Trail Camera Supported 4G LTE cellular networks
- GardePro cellular trail camera Unsupported SIM Cards for Freedom Model Cameras
- GardePro cellular trail camera's Cellular Transfer function
- GardePro cellular trail cameras activation notes
- GardePro X60P Live Max, X60PLMB, or X60 Pro Max experiences unreasonable false triggers
- Global 4G LTE cellular networks corresponding to SIM mode IR
- How to check if your country can use GardePro cellular trail camera
- How to quickly test if the Celluar trail camera is connected properly to the App
- How to select the Sim Mode on your mobile phone
- How to tell if your cellular Trail camera model
- What's special about Freedom Unlocked SIM-free model
- Why Does My GardePro X66 Pro Use Battery Faster
- X60P Live Max Quick Activation Guide
- Activate GardePro 4G Cellular LTE Trail Camera Freedom
- Celluar Camera firmware and MCU module upgrade
- GardePro Cellular Camera Model Comparison: X60PMB vs X50MB vs X20
- X66 Series Camera Activation Guide
- What is the WiFi Direct Connection Range?
- What affects Direct WiFi Connection distance?
- What can you do with Direct Connection Mode?
- How does WiFi Direct Connection work?
- What is WiFi Direct Connection?
- Why Are Only 40 Photos Showing in the App?
- Can I Turn Off My WiFi Camera Through the App?
- What Is the Difference Between a WiFi Trail Camera and a Home WiFi Security Camera?
- Can I use my WiFi camera as a non-cellular trail camera?
- Why Can’t I Connect to My WiFi Trail Camera on iOS 26?
- Why won’t my app connect to my WiFi trail camera?
- How to Update Firmware on WiFi Trail Cameras with Built-in Storage
- How to Fix Live View Issues on WiFi Trail Cameras (iPhone 17)
- Can I View Wi-Fi Trail Camera Photos Remotely?
- How to Live Stream on Twitch with the GardePro WiFi Camera
- How to Quickly Activate Your WiFi Camera?
- QUICK START GUIDE For Wi-Fi Trail Camera-WiFi-Trail-Camera-QUICK-START-GUIDE
- The difference between GardePro WiFi trail camera and GardePro cellular trail camera
- Understanding GardePro Wi-Fi & Bluetooth Connection Technology
- When the Wifi&Cellular camera encounters some unsolvable issues
- When the Wifi&Cellular camera encounters some unsolvable issues
- Why can't I use the Live stream of the WiFi camera (ios)
- Wi-Fi connected, but can't see any camera information and can't preview
- How Do Walls, Height, and Trees Affect the GardePro Link Hub and Camera Signal?
- Will Placing My Router Inside a Closet or Enclosed Space Affect the GardePro Link Hub Connection?
- What Should I Do if the Link 1.0 Hub Firmware Update Fails at 100%?
- Do I Need to Request a Video Preview in the Link System?
- What Do the Hub Indicator Lights Mean During Troubleshooting?
- What Should I Do if My Hub Goes Offline After a Power Outage?
- What should I do if R3 Pro is stuck at 98% during firmware update?
- How is the Link Hub powered?
- What should I do if my paired R3 Pro camera frequently goes offline while the Hub stays online?
- Can I use the Link 1.0 Hub with other GardePro trail cameras?
- How do I determine my Link Hub's network connection status using the LED indicator lights?
- What if the Link Hub Shows a Solid Blue Light?
- Can I use an external antenna to improve the signal reception of my R3 Pro camera?
- What Does the Blinking Green Light on the Hub Mean?
- Why can't I add my Hub to the app?
- How to Set Up and Connect Your GardePro Link System: A Step-by-Step Guide
- Link 1.0 (R3 Pro+Hub)-FAQs
- R3 Pro Firmware Update Guide(Fix Network Issue)
-
Cellular Camera
- X66 3.0 Ultra - Product Overview
- X66 Pro Max - Product Overview
- X66 Pro - Product Overview & Feature Guide
- A80 Series - Product Overview
- E9 2.0 Series - Product Overview
- E6 2.0 Series – Product Overview
- E6+ Product Overview
- E8 2.0 Series - Product Overview
- How Can I See the Solar Panel’s Battery Level in the App?
- How to Share Photos and Videos
- How Do I Add a Payment Method?
- How Do I Set a Default Payment Method?
- How Do I Remove a Payment Method?
- What Does Error 205 Mean When Using “Take a Photo”?
- Why am I not receiving the verification code email during registration or sign-in?
- GardePro Edge AI - FAQ
- AI Tags Feature Guide
- Smart Capture Feature Guide
- Take a Photo (Diagnostic) Feature Guide
- How to Request and Download HD Video Clips
- Camera Sharing Feature Guide
- Firmware Upgrade Reference Table for GardePro Trail Camera
- GardePro App for Cellular Trail Camera
- GardePro App for WiFi Trail Cameras?
- GPS Feature Guide
- How to clear GardePro app cache
- How to Download 4G Camera Photos or Videos to Your Phone Gallery
- How to resolve payment-related issues with the GardePro data plan
- How to select all and delete all in app gallery
- How to upgrade the firmware of GardePro trail cameras
- Shared Plan Guide
- Understand the Cellular transfer Settings in the GardePro Mobile App
- Understanding the Basic Settings and Advanced Settings in the GardePro Mobile App
- Video Preview Feature Guide
- Worry-Free Delivery Protection and Claims Guide
- How do GardePro gift cards work?
- Return shipping costs & conditions
- Can I change my shipping address after placing an order?
- Do you offer free shipping?
- How long does it take to process and ship my order?
- Why did my payment fail, and how can I fix it?
- Is my payment information secure?
- What payment methods do you accept?
- GardePro Credits Rewards Program Customer Guide: How to Earn & Redeem Credits
- GardePro Global Shipping Destinations and Delivery Times
- GardePro Warranty Information
- Return & Refund Policy
- What's the difference between Tax and Duty
- GardePro Mobilfunk-Trail-Kamera X20 Handbuch
- GardePro Mobilfunk-Trail-Kamera X20WF Handbuch
- GardePro Mobilfunk-Trail-Kamera X50 Handbuch
- GardePro Mobilfunk-Trail-Kamera X50MB Handbuch
- GardePro Mobilfunk-Trail-Kamera X60P Handbuch
- GardePro Mobilfunk-Trail-Kamera X60PLMB Handbuch
- GardePro Mobilfunk-Trail-Kamera X60PMB Handbuch
- GardePro Wildkamera A3S Handbuch
- GardePro Wildkamera A5 Handbuch
- GardePro Wildkamera A5WF Handbuch
- GardePro Wildkamera E5S Handbuch
- GardePro WLAN-Wildkamera E6 Handbuch
- GardePro WLAN-Wildkamera E6P Handbuch
- GardePro WLAN-Wildkamera E6PCF Handbuch
- GardePro WLAN-Wildkamera E6PMB Handbuch
- GardePro WLAN-Wildkamera E8 Handbuch
- GardePro WLAN-Wildkamera E8P Handbuch
- GardePro WLAN-Wildkamera E8PMB Handbuch
- GardePro WLAN-Wildkamera E8PWF Handbuch
- GardePro WLAN-Wildkamera E9 Handbuch
- GardePro WiFi Trail Camera E6 2.0 Instuction Manual
- GardePro WiFi Trail Camera A80 Instuction Manual
- GardePro WiFi Trail Camera E6 Instuction Manual
- GardePro WiFi Trail Camera E6P Instuction Manual
- GardePro Wifi Trail Camera E6PCF Instuction Manual
- GardePro WiFi Trail Camera E6PMB Instuction Manual
- GardePro WiFi Trail Camera E7 Instuction Manual
- GardePro WiFi Trail Camera E8 Instuction Manual
- GardePro WiFi Trail Camera E8P Instuction Manual
- GardePro WiFi Trail Camera E8PCF Instuction Manual
- GardePro WiFi Trail Camera E8PMB Instuction Manual
- GardePro Wifi Trail Camera E8PWF Instuction Manual
- GardePro WiFi Trail Camera E9 Instuction Manual
- GardePro WiFi Trail Camera E9P-E9PWF-E9PCF-E9P MAX Instuction Manual
- GardePro X60P-X60PWF-X60PCF-X60P MAX Manuale di istruzioni V1.0 EN+LT
- GardePro Cellular Trail Camera X20 Instuction Manual
- GardePro Cellular Trail Camera X20WF Instuction Manual
- GardePro Cellular Trail Camera X50 Instuction Manual
- GardePro Cellular Trail Camera X50MB Instuction Manual
- GardePro Cellular Trail Camera X60P Instuction Manual
- GardePro Cellular Trail Camera X60PLMB Instuction Manual
- GardePro Cellular Trail Camera X60PMB Instuction Manual
- GardePro Cellular Trail Camera X66 Pro Instuction Manual
- GardePro N5 NIGHT VISION GOGGLES Instruction Manual V1.0 EN 20240224
- GardePro Solar Panel SP300 Instruction_Manual_v1.0_EN
- GardePro Solar Panel SP350 Instruction_Manual_v1.0_EN
- GardePro Trail Camera A3S Instuction Manual
- GardePro Trail Camera A5 Instuction Manual
- GardePro Trail Camera A5WF Instuction Manual
- GardePro Trail Camera A60 4K Instuction Manual
- GardePro Trail Camera E5S Instuction Manual
- About Wall Mount Bracket Assembly
- Discover exclusive discounts for Gardepro
- Firmware Update for Camera
- Firmware Update for monitor
- GardePro Baby Monitor B3 - Instruction Manual
- GardePro Baby Monitor Product FAQ
- How to install a wall mount
- Q1: How to operate in the menu?
- Q10: Where to buy a camera?
- Q11: Will this work on the 5g network or the Wi-Fi network?
- Q12: Can it also connect to your phone?
- Q13: Does the camera part need to be plugged in?
- Q14: Will it block out the white noise machine?
- Q15: Will this camera notify you when there is motion in the room?
- Q16: What does the blinking green light on the baby unit camera mean?
- Q17: What is the resolution of the baby camera and monitor?
- Q18: How will the alarm/alert detection affect the system?
- Q19: How can I set the Sound detection?
- Q2: How to update the baby monitor?
- Q20: If the monitoring screen is not clear at night, the night vision effect is not good?
- Q21: If there exists a whistling/howling phenomenon after opening the monitoring screen?
- Q22: What if the surveillance screen is always black and white, or is it pitch black at night?
- Q23: How to turn on multiple cameras in Patrol/Scan mode?<
- Q24: How to place the camera on the wall?
- Q25: What is the longest connection distance?
- Q26: How to do when the monitor cannot turn on?
- Q27: What do the screen sleep parameters mean?
- Q29: Can I review the video a day before?
- Q3: How to play and stop lullabies?
- Q30: How can I copy the data from the camera to my phone / pc?
- Q31: How can I estimate the wireless communication distance betwwen the monitor and camera ?
- Q4: How to adjust the Speak/Talk volume of a camera?
- Q5: How to adjust the alarm volume of the monitor?
- Q6: How to adjust the lullaby volume of the camera?
- Q7: How to adjust the screen’s brightness?
- Q8: How can i add a new camera to the network?
- Q9: Is this monitor 720p or 1080p?
- Q19: How can I set the Sound detection?
- Q20: If the monitoring screen is not clear at night, the night vision effect is not good?
- Q21: If there exists a whistling/howling phenomenon after opening the monitoring screen?
Camera Installation Guide
Table of Contents
Mounting your trail camera correctly can make the difference between capturing great wildlife footage and filling your memory card with false triggers.
This guide covers camera height and angle, sunlight direction, false-trigger prevention, mounting methods, and weather protection.
The installation guidance in this guide applies to all GardePro trail camera models. For illustration purposes, the GardePro E8 2.0 Pro is used as the example camera.
Installation Height and Angle Adjustment
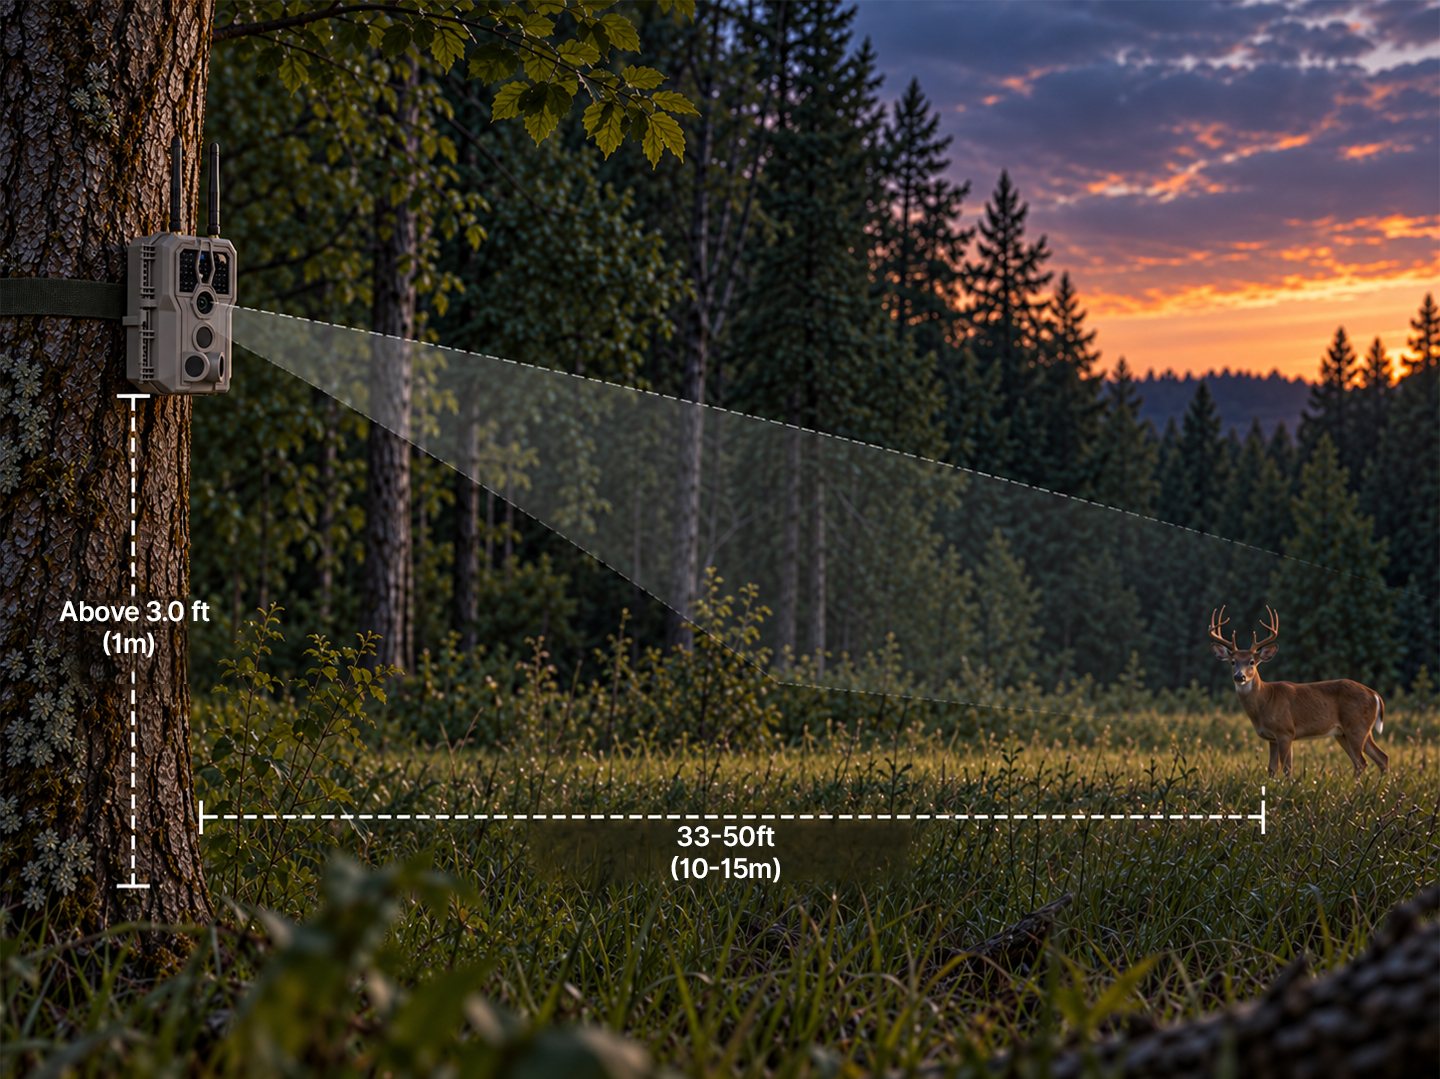
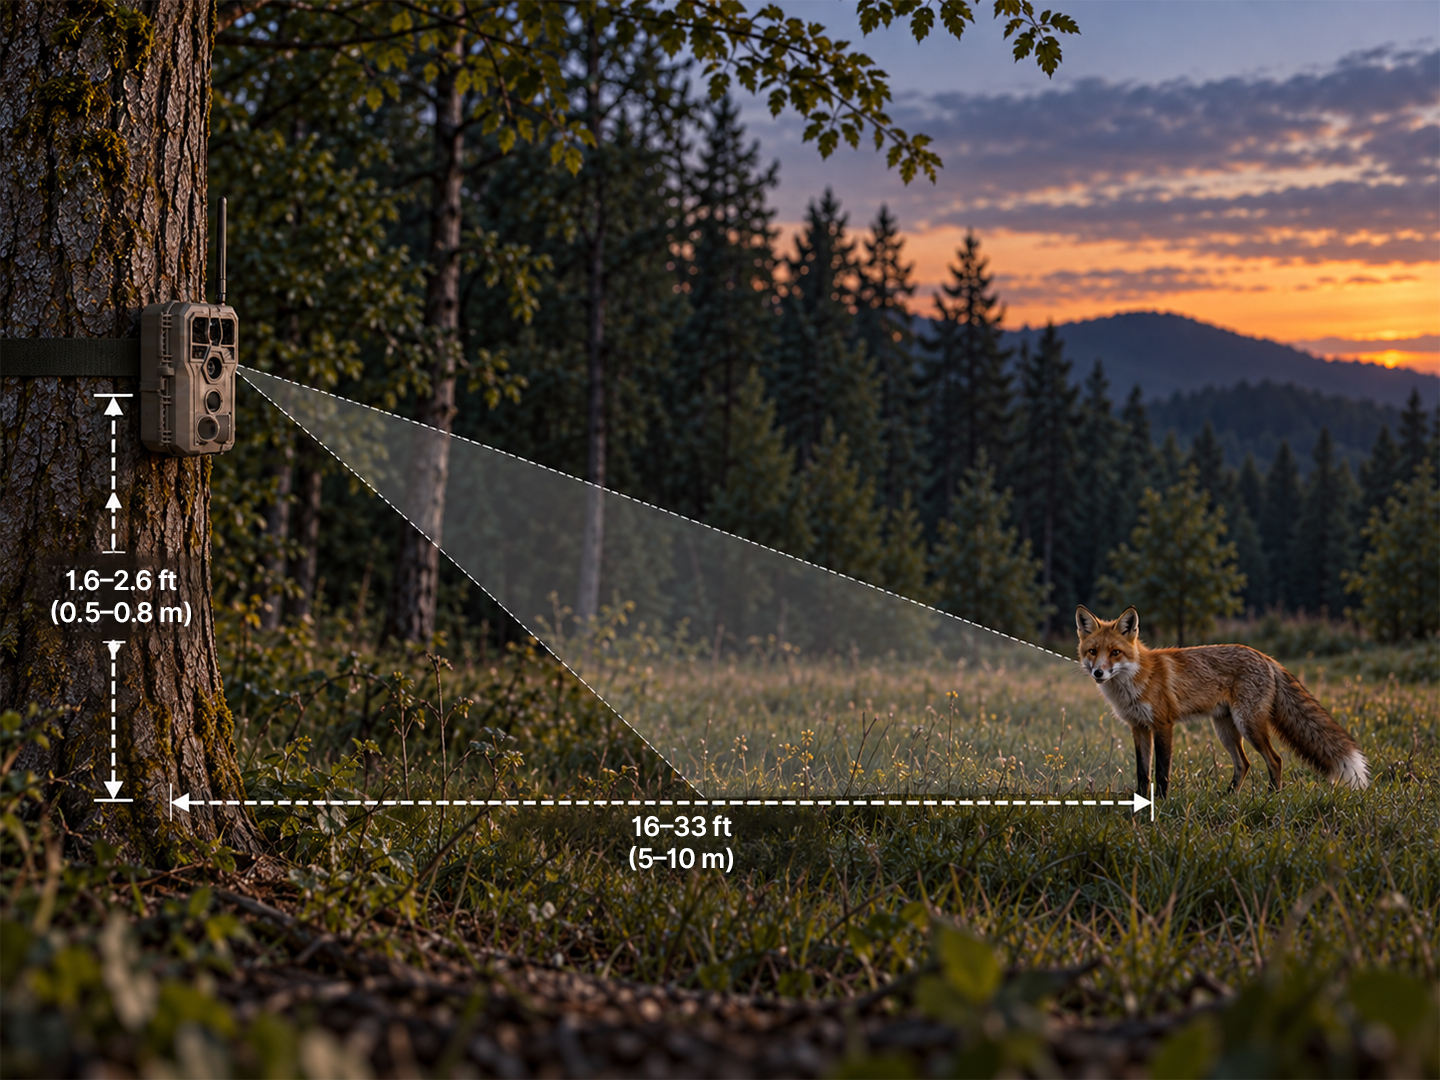
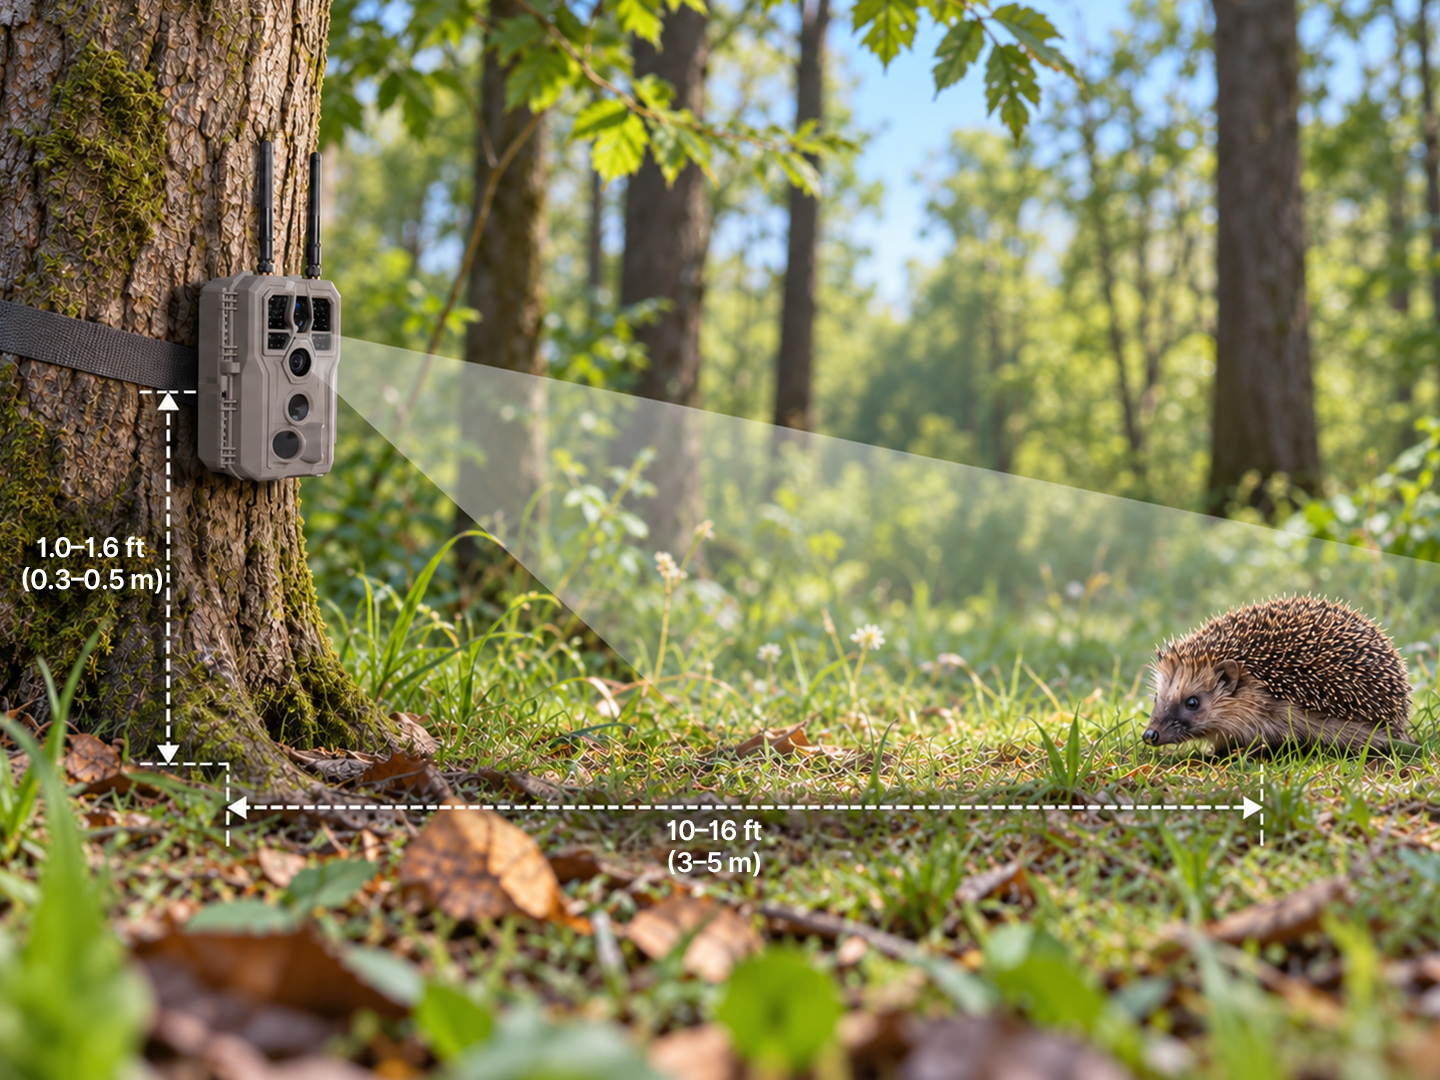
Pick a height based on the target animal size. The detection zone must CROSS the animal's expected walking path — not face it head-on.
Large Animal (Deer, Elk, Bear, etc.)
|
Height from ground |
Above 3.0 ft (1 m) |
|
Distance to target |
33–50 ft (10–15 m) |
|
Tilt angle |
Slightly downward (~10°) |
|
Best targets |
Deer, elk, bear, moose, wild boar, etc. |
Medium-sized Animal (Fox, Raccoon, Coyote, etc.)
|
Height from ground |
1.6–2.6 ft (0.5–0.8 m) |
|
Distance to target |
16–33 ft (5–10 m) |
|
Best targets |
Fox, raccoon, coyote, badger, wildcat, etc. |
Small Animal (Hedgehog, Rabbit, Squirrel, etc.)
|
Height from ground |
1.0–1.6 ft (0.3–0.5 m) |
|
Distance to target |
10–16 ft (3–5 m) |
|
Best targets |
Hedgehog, rabbit, squirrel, weasel, etc. |
General-purpose setting
If you are unsure what animals visit your area, mount the camera at 3-5 ft (0.8–1.5 m) and aim slightly downward. The detection zone should CROSS the expected animal path — not face it head-on. This single tip dramatically increases trigger accuracy.
Avoid False Alarms Caused by Swaying Branches and Leaves
Wind-blown vegetation in front of the lens is the #1 cause of false triggers. Clear a buffer zone around the camera before mounting.
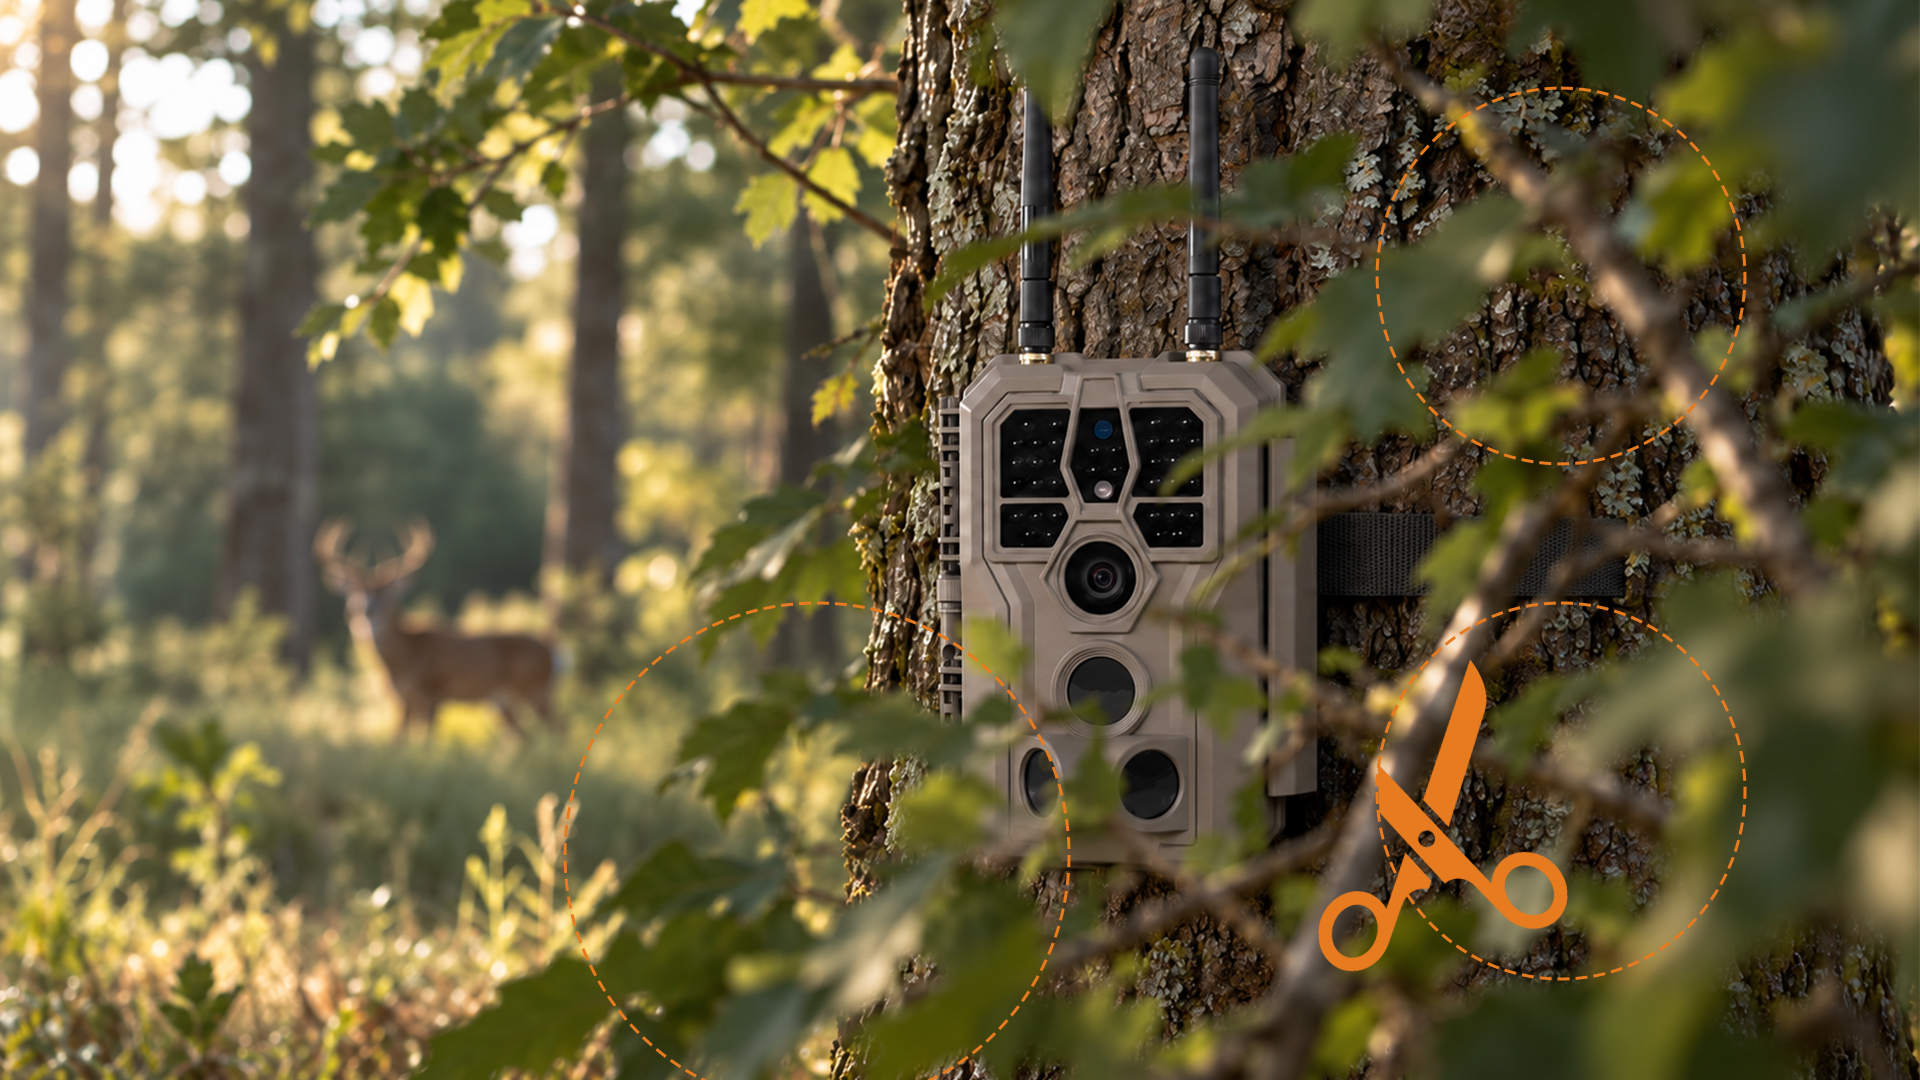
Trim the buffer zone. Use pruning shears to cut back any vegetation within 2–3 m of the lens.
Aim slightly downward. This keeps ground-level grasses out of the frame and improves focus on the target zone.
Avoid pointing at water surfaces that may reflect light or shimmer.
Walk-test the path. Before locking down the camera, walk the expected animal path and confirm the detection zone covers it.
⚠ Important
Clear grass, branches, and tall weeds within 7–10 ft (2–3 m) of the sensor. Anything that sways in the wind within this buffer will trigger the camera — draining battery and filling the SD card with empty clips.
Install With the Light to Avoid Glare or Overexposure
Position the camera so the sun is BEHIND or BESIDE the camera. Direct sunlight into the lens causes white-out, glare, and false triggers.
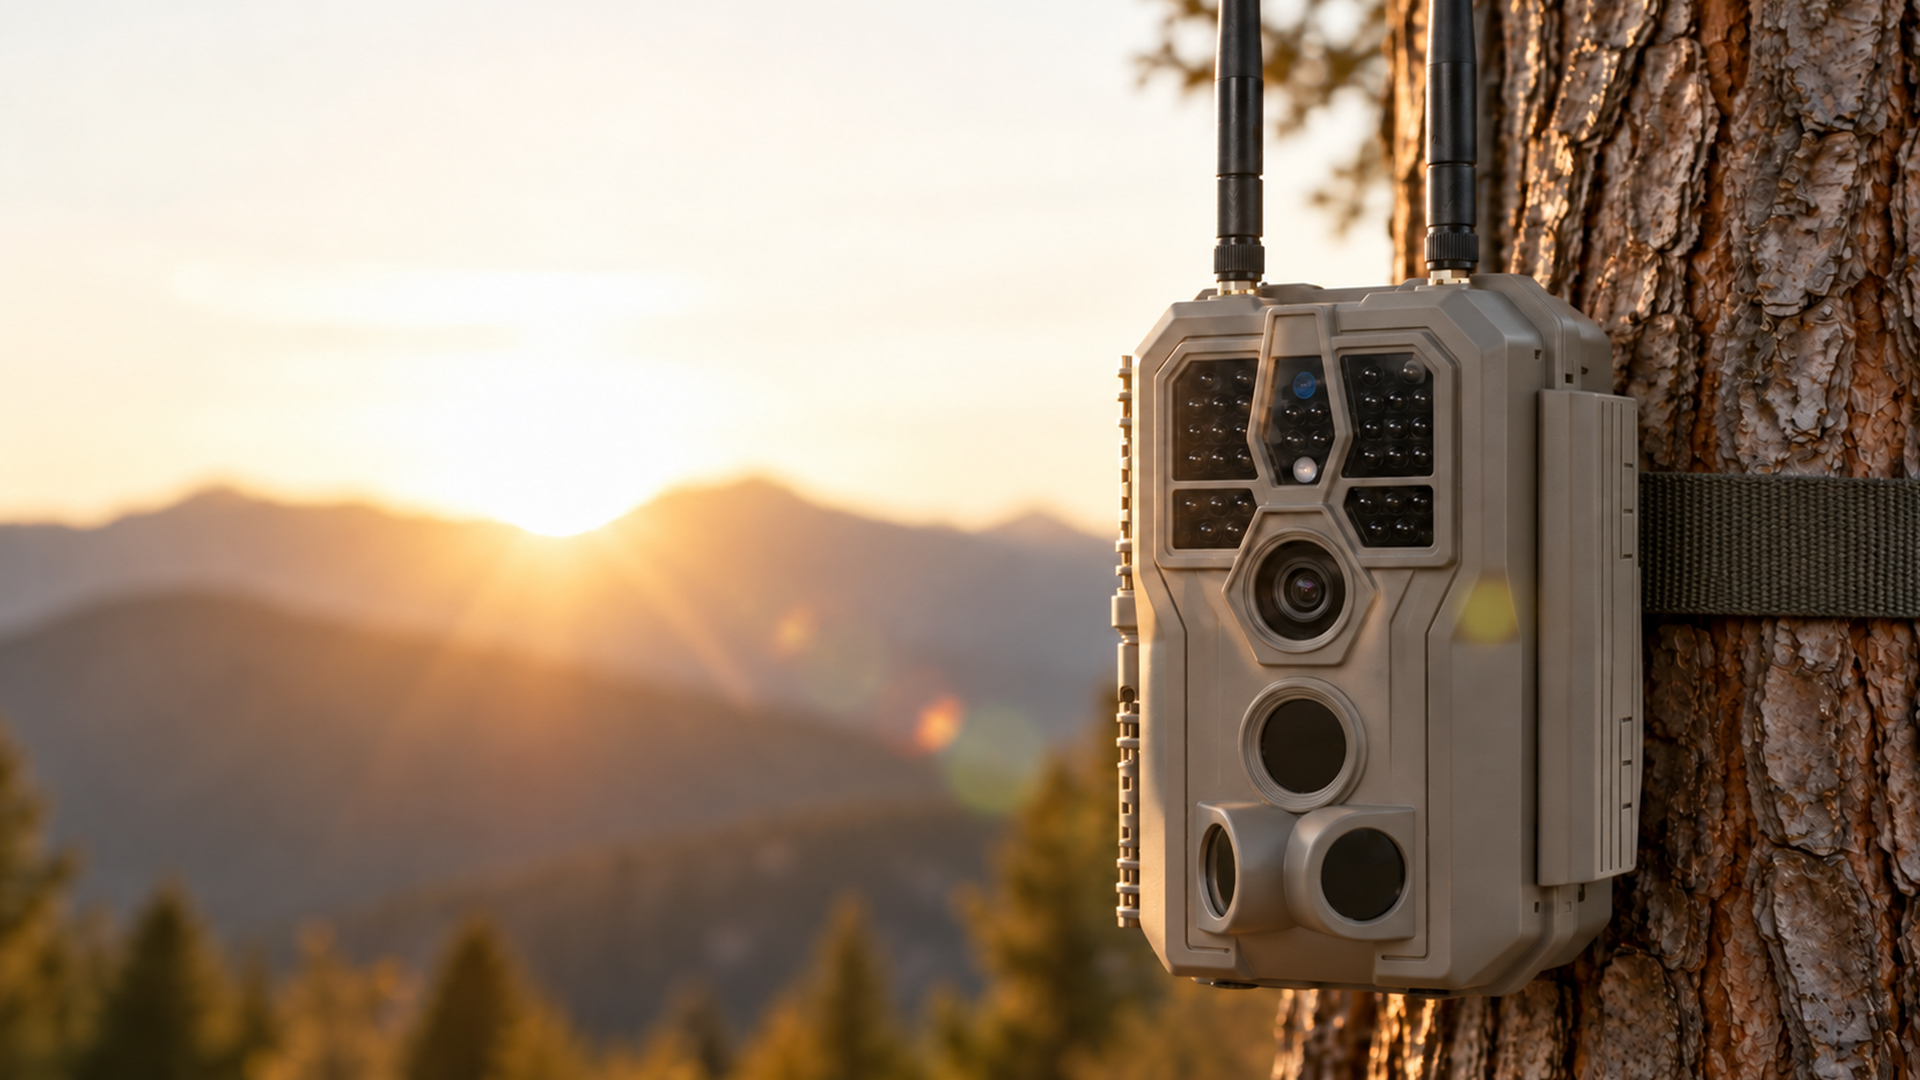
Tip — Compass orientation
Face the camera NORTH or SOUTH in the Northern Hemisphere (the opposite in the Southern Hemisphere). This avoids shooting directly into the rising/setting sun and gives consistent lighting all day.
Mounting Methods
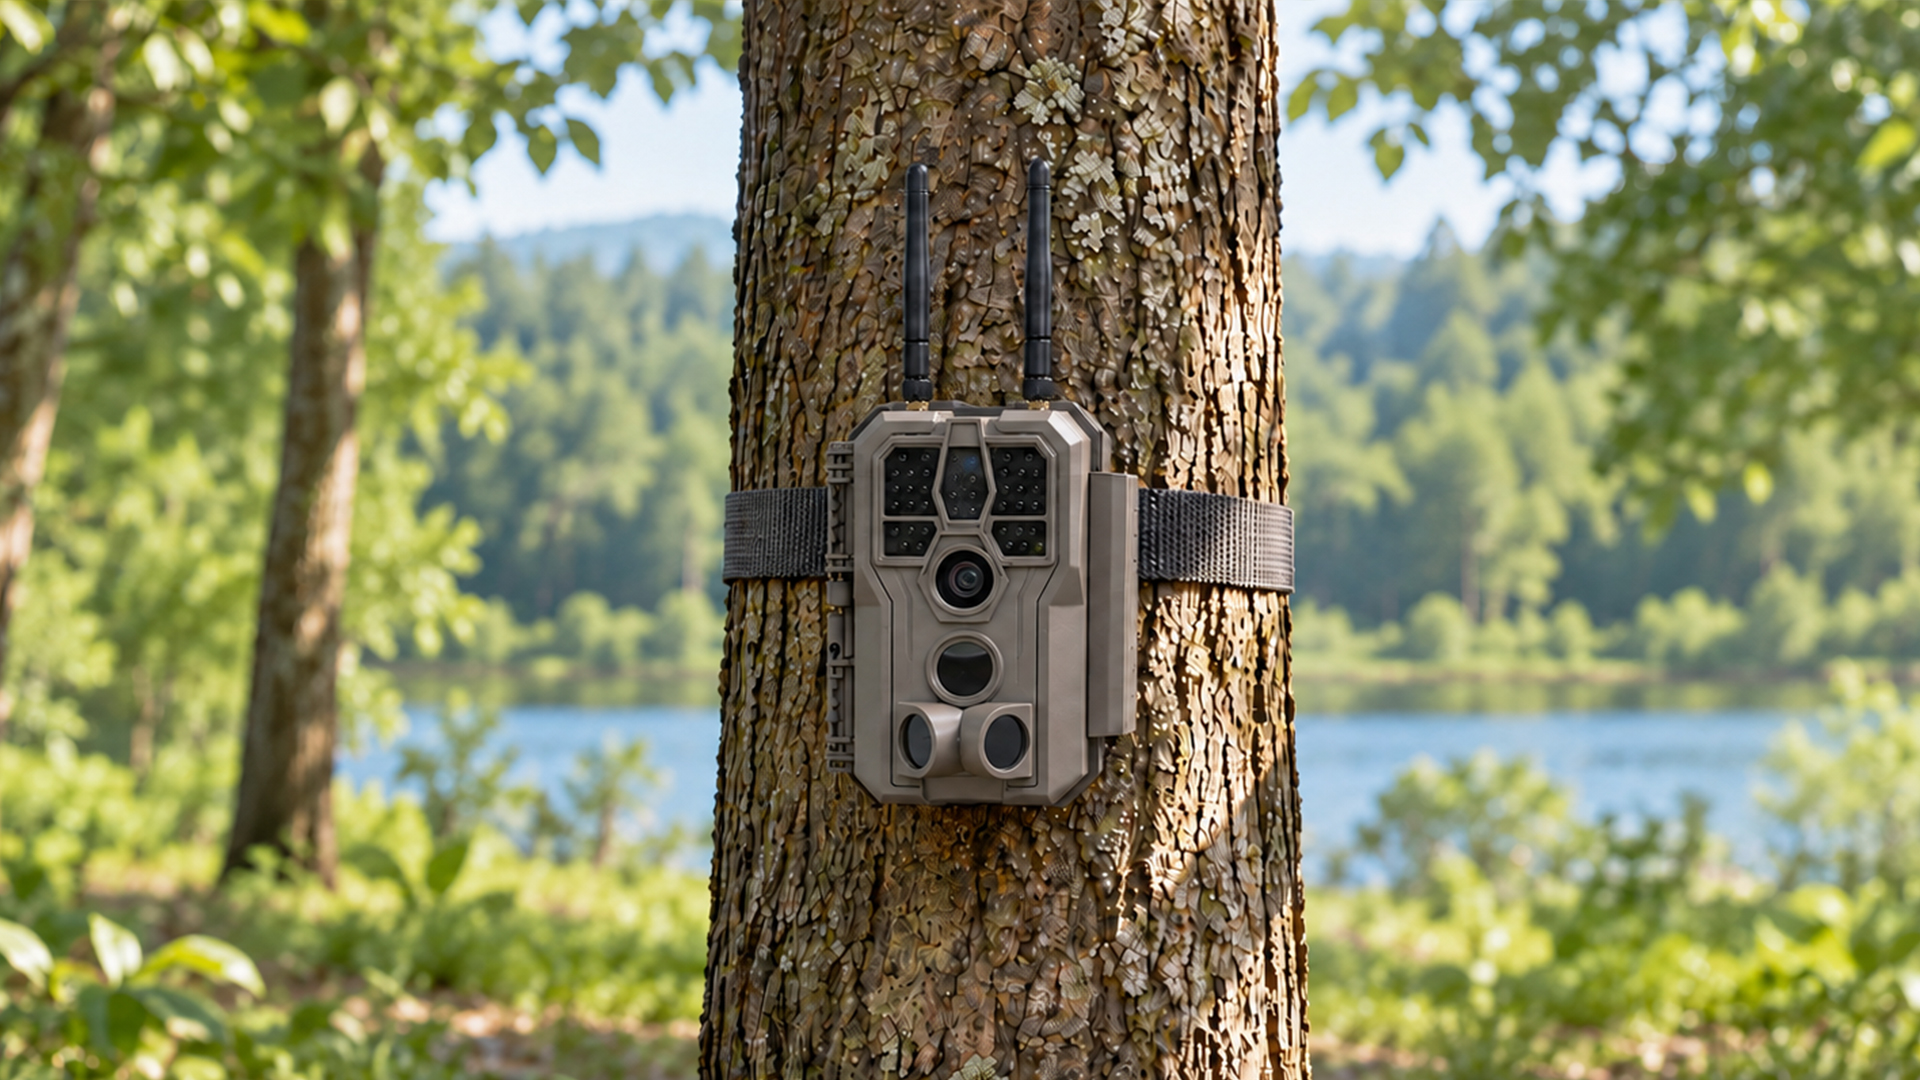
A mounting strap is included with the camera. It is suitable for most common installations.
Using the Strap
Wrap the strap around a tree, post, or fence rail, then thread it through the loop on the back of the camera. Tighten the strap securely to keep the camera in place.
|
Mounting Method |
Included |
Recommended For |
|
√ |
Trees, posts, and fence rails |
|
|
Optional |
Walls, buildings, and solid wood posts |
|
|
Tripod |
Optional |
Open areas without trees, such as riverbanks, grasslands, and farms |
|
Optional |
Locations where extra protection against tampering or theft is needed |
Weather Sealing & Battery Care
The camera is rated IP66 weather-resistant — but only when seals are correctly closed.
Lock the battery door tightly. Make sure the latch clicks and the rubber gasket is clean and seated.
Close the port cover over the USB / SD-card slots. Even a small gap can let in rain or insects.
Use fresh, matched batteries. Don't mix old and new batteries or different brands — this causes leaks.
In cold weather (below −10 °C / 14 °F), use lithium batteries. Alkalines lose capacity fast in the cold.
Avoid direct rain splash zones such as an unprotected roof edge — even IP66 has limits.
⚠ Warranty note
Water damage from an improperly sealed door is not covered under warranty. Always double-check the seal after every battery change.
Quick Installation Checklist
|
✓ Height matches target animal size |
3-5 ft (0.8–1.5 m) for general use |
|
✓ Aimed slightly downward |
~10° downward tilt |
|
✓ Detection zone crosses animal path |
Perpendicular to movement |
|
✓ Sun is behind / beside camera |
Face north or south (N. hemisphere) |
|
✓ Buffer zone cleared 7–10 ft (2–3 m) |
No swaying branches or grass |
|
✓ SD card inserted & formatted |
Full-Size, Class 10 or higher |
|
✓ Batteries fresh & matched |
Lithium for cold weather |
|
✓ Battery door & port cover sealed |
Rubber gasket clean |
If your problem still cannot be solved, please contact us.
Updated on 19 Sep 2026
Is it helpful to you?
Thanks for your feedback
-
Free ShippingFree global shipping on orders over $50.
-
2-Year WarrantyGardePro Shop Exclusive Offer.
-
24/7 Live Support7x24-hour after-sales team will solve your problems.
-
Money Back30 days return guarantee.
- Choosing a selection results in a full page refresh.
- Opens in a new window.